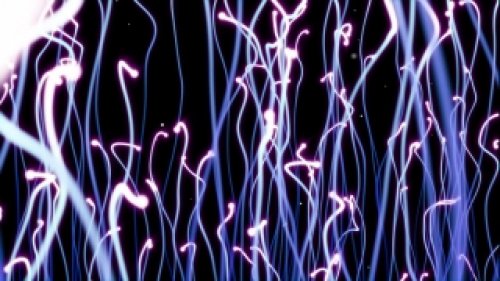
Understanding Film Burn Effects
Film burn effects are a fascinating visual technique that imitates the appearance of damaged film stock, often resulting in a dreamy and ethereal quality. Traditionally, these effects were achieved through physical film burns, where actual film stock would be exposed to extreme heat or light, leading to unintended color shifts and texture deterioration. In modern digital video editing, however, filmmakers and video editors can emulate these effects using software tools like Adobe Premiere Pro, After Effects, DaVinci Resolve, and others. This guide will walk you through the essential tips and tricks for integrating film burn effects into your video projects, ensuring a professional and polished outcome.
Applying film burn effects not only adds an artistic flair but can also create seamless transitions between scenes, enhancing the overall narrative flow of your video. As viewers become more sophisticated, they appreciate nuanced visual storytelling; thus, mastering film burn effects can set your work apart from others. Whether you’re creating a short film, a music video, or promotional content, understanding how to effectively use film burn effects can elevate the production quality considerably.
Choosing the Right Software
The first step in achieving stunning film burn effects is selecting the right video editing software that meets your project needs. Popular choices like Adobe Premiere Pro and After Effects offer robust capabilities for creating and manipulating film burn effects. For example, After Effects provides extensive control over layers and effects, making it ideal for creating complex burn animations. Alternatively, DaVinci Resolve is known for its powerful color grading tools, allowing you to enhance the color shifts associated with film burns. In this section, we will discuss how to get started with each software option and explore their unique features that support film burn effects.
- Adobe Premiere Pro: Premiere Pro is a user-friendly platform for beginners and professionals alike. You can easily overlay film burn video clips or use adjustment layers to create a similar effect.
- Adobe After Effects: This software is perfect for more advanced users who want to create custom animations and effects. Utilize the 'Blend Modes' and 'Opacity' settings for seamless integration.
- DaVinci Resolve: Known for its outstanding color grading capabilities, Resolve allows you to fine-tune the colors of your film burn effects, giving you the flexibility to match them to your footage.
Creating Film Burn Effects in Adobe Premiere Pro
Adobe Premiere Pro is an excellent platform for beginners to start experimenting with film burn effects. The process is relatively straightforward, and you can achieve impressive results with minimal effort. Here’s a step-by-step guide for creating film burn effects in Premiere Pro:
Step 1: Find Film Burn Footage
Begin by sourcing high-quality film burn footage. There are numerous stock video websites offering free and paid options. Ensure the footage you select aligns with the overall aesthetic of your project. Look for clips that contain vibrant colors and dynamic movement to enhance the effect.
Step 2: Import and Overlay
Import the film burn footage into your Premiere Pro project. Drag your desired film burn clip onto the timeline, placing it above the main video layer. This will create an overlay effect.
Step 3: Adjust Blend Modes
With the film burn layer selected, navigate to the 'Effect Controls' panel. Locate the 'Blend Mode' dropdown menu and experiment with different modes such as 'Screen' or 'Add.' These modes will allow the colors from your film burn footage to interact with the layers below, creating a natural burn effect.
Step 4: Fine-tune Opacity
To achieve the desired intensity of the film burn effect, adjust the opacity of the film burn layer. Lowering the opacity can create a subtle effect, while increasing it can produce a more dramatic look. Play around with these settings until you find the right balance that enhances your scene without overpowering it.
Advanced Techniques in After Effects
For those looking to take their film burn effects to the next level, Adobe After Effects offers advanced tools for creating captivating visuals. Here, we will explore some techniques that harness After Effects' powerful capabilities to create stunning film burn effects.
Using Keyframes for Animation
One of the standout features of After Effects is its ability to animate parameters using keyframes. This can be extremely beneficial when creating film burn effects that are dynamic and evolve throughout your video. To animate the burn effect, begin by placing your film burn footage on the timeline. Then, set keyframes for opacity and position to create a sense of movement. This will help your film burn effect feel integrated into the scene rather than static.
Adding Color Grading
After you've created your basic film burn effect, consider enhancing it further with color grading. Use the 'Color Correction' tools within After Effects to adjust hues and saturation levels, ensuring that the burn effect matches the mood of your video. You can use the 'Hue/Saturation' effect to shift colors or the 'Lumetri Color' panel for more advanced color grading options.
Layering Multiple Effects
Combining multiple film burn layers can create a rich and complex visual texture. You can overlay different burn clips and adjust their opacities and blend modes to produce unique effects. Additionally, consider incorporating other effects such as lens flares or light leaks to further enhance the cinematic quality of your scene.
Incorporating Film Burn Effects in DaVinci Resolve
DaVinci Resolve is another powerful tool for video editors, particularly known for its sophisticated color grading features. Integrating film burn effects in Resolve requires a slightly different approach, but the results can be equally stunning. Here’s how to do it:
Step 1: Import Footage
Start by importing both your main footage and the film burn clips into DaVinci Resolve. Once imported, drag them onto the timeline. Place the film burn clip above your main video layer.
Step 2: Use the Color Page
Navigate to the 'Color' page in DaVinci Resolve. Here, you can utilize various color grading tools to adjust the film burn effect. Use the 'Color Wheels' to modify the shadows, midtones, and highlights of your film burn clip to better match the aesthetic of your main footage.
Step 3: Create Power Windows
To enhance the film burn effect further, consider using 'Power Windows' to isolate specific areas where you want the effect to be more pronounced. This technique allows for fine control over where the film burn appears, creating a more immersive experience for the viewer.
Final Touches and Exporting
Once you’ve successfully applied and fine-tuned your film burn effects, it’s time to prepare your project for export. Before exporting, ensure that all layers are properly aligned, and transitions are smooth. Review your project to confirm that the film burn effects enhance the storytelling without being distracting.
Export Settings
When exporting your video, choose the right codec and format based on your distribution needs. For platforms like YouTube and Vimeo, H.264 is a commonly used codec that provides a good balance between quality and file size. If you’re working on a project for cinema or high-quality distribution, consider exporting in ProRes or DNxHD for superior quality.
Final Review
Before hitting that export button, conduct a final review of your video. Pay close attention to how the film burn effects interact with other visual elements in your project. Do they complement or detract from the overall narrative? Ensure that the pacing feels right and that the film burn effects enhance the emotional impact of your story.
By mastering these tips and techniques, you can effectively incorporate film burn effects into your video projects, elevating your storytelling and visual aesthetics. Whether using Premiere Pro, After Effects, or DaVinci Resolve, these methods will help you create stunning visuals that resonate with your audience.