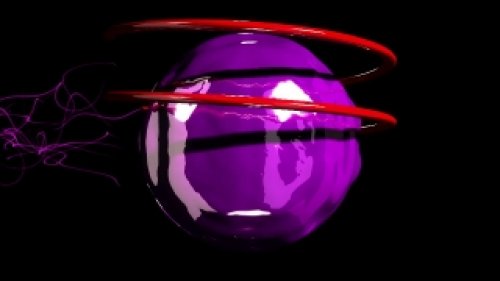
Introduction to Equalizer Animations
Equalizer animations, also known as audio spectrum visualizers, are captivating visual representations of sound waves and audio frequencies. They play a crucial role in enhancing music videos, live performances, and multimedia presentations. These animations respond in real time to audio input, creating an immersive experience for viewers. As technology advances, so does the accessibility of tools for creating stunning equalizer animations, enabling creators to integrate these effects into their projects with ease. This guide will explore the best templates and presets available in 2026, along with step-by-step instructions for using them in popular software like Adobe After Effects, Premiere Pro, and DaVinci Resolve.
Choosing the Right Templates and Presets
When it comes to equalizer animations, the right template can significantly impact the overall effectiveness of your project. Templates are pre-designed files that allow you to insert your audio and customize the visual output without starting from scratch. There are numerous options available, ranging from simple waveforms to intricate 3D visualizations. In 2026, creators have access to a plethora of high-quality templates that can be easily modified to suit individual styles. Before selecting a template, consider the following factors:
- Type of Project: Is it for a music video, live event, or presentation? Different projects require different styles of equalizer animations.
- Software Compatibility: Ensure that the template is compatible with your editing software (e.g., After Effects, Premiere Pro, DaVinci Resolve).
- Customization Options: Look for templates that allow significant customization, such as color changes, size adjustments, and animation speed.
- User Reviews: Check reviews and ratings from other users to gauge the quality and usability of the template.
Once you’ve identified a template that fits your needs, you can proceed to download and install it in your chosen software. This process will vary slightly depending on the program you are using, which we will cover in the next section.
Installing Equalizer Animation Templates
Installing equalizer animation templates can differ based on the software you are using. Below are detailed instructions for installing templates in Adobe After Effects, Premiere Pro, and DaVinci Resolve. Following these steps will ensure a seamless integration of your chosen template into your workflow.
Adobe After Effects
1. Download your chosen equalizer animation template from a reputable source.
2. Open Adobe After Effects and create a new project or open an existing one.
3. Navigate to the 'File' menu, select 'Import,' and then choose 'File...' to locate your downloaded template.
4. Once imported, you will see your template in the Project panel. Drag it onto the timeline.
5. Customize the template by adjusting layers, colors, and audio inputs as needed. You can replace the placeholder audio with your own track to see the animation in action.
Adobe Premiere Pro
1. Download and extract the template files if they are zipped.
2. Open Adobe Premiere Pro and create a new sequence.
3. Go to the 'Graphics' workspace and open the 'Essential Graphics' panel.
4. Click on 'Browse' to locate your downloaded template files. You can either import them from your file explorer or directly drag and drop them into the panel.
5. Once imported, drag the template onto your timeline. You can then customize it by changing colors, effects, and audio tracks to suit your project.
DaVinci Resolve
1. Download the equalizer animation template and extract it if necessary.
2. Open DaVinci Resolve and navigate to the 'Edit' page.
3. Right-click in the Media Pool and select 'Import Media' to add your template files.
4. Drag the template onto your timeline. You can adjust the audio track and customize the visual aspects in the Inspector panel.
Customizing Your Equalizer Animations
Once you have installed your equalizer animation template, the next step is customization. Personalizing your animations not only enhances the visual appeal but also ensures that they align with your project's branding and style. Here are some key elements to consider when customizing your equalizer animations:
Color Adjustments
Colors play a vital role in visual storytelling. Using color theory can guide your choices to evoke specific emotions and complement the music's tone. In most editing software, you can access color settings in the effects panel or within the template's layers. For example, in After Effects, you can use the 'Color Correction' effect to modify the hues, saturation, and brightness of your animations. Experiment with different color palettes and gradients to find the perfect match for your project.
Animation Speed and Style
Adjusting the animation speed can significantly impact how viewers perceive the music. Faster animations may convey energy and excitement, while slower animations can create a more subdued atmosphere. Most templates allow you to manipulate keyframes in the timeline, enabling you to speed up or slow down animations easily. Additionally, consider altering the animation style—switching from a linear to an ease-in/ease-out motion can add more fluidity to your visuals.
Audio Synchronization
One of the most critical aspects of equalizer animations is synchronization with the audio. Ensure that your animations respond accurately to the music's rhythm and beats. Most templates are designed to sync automatically, but you may need to adjust the settings. In After Effects, for example, you can use the 'Audio Spectrum' effect to analyze audio frequencies and adjust parameters for better synchronization. Test different audio tracks to see how well your visuals respond and make adjustments accordingly.
Finalizing and Exporting Your Project
After customizing your equalizer animations, the final step is to export your project. This process will vary slightly depending on the software you used, but the general principles remain the same. Here are the steps to ensure a high-quality export in Adobe Premiere Pro, After Effects, and DaVinci Resolve:
Adobe Premiere Pro
1. Once you are satisfied with your project, navigate to the 'File' menu and select 'Export' followed by 'Media.'
2. In the export settings, choose your desired format, such as H.264 for web use or ProRes for higher quality.
3. Adjust the resolution and bitrate settings according to your project’s requirements.
4. Click 'Export' and wait for the process to finish.
Adobe After Effects
1. Go to 'Composition' in the menu and select 'Add to Render Queue.'
2. In the Render Queue, adjust your output settings, including format and resolution.
3. Click 'Render' to export your finished animation.
DaVinci Resolve
1. Switch to the 'Deliver' page once your editing is complete.
2. Choose your export format and adjust the settings as necessary.
3. Click 'Add to Render Queue' and then 'Start Render' to export your project.
Conclusion
Equalizer animations add a dynamic layer to music visualizers, enhancing the viewer's experience while providing a visual representation of audio. By selecting the right templates and presets, installing them correctly, customizing to fit your project's needs, and following proper export procedures, you can create stunning equalizer animations that captivate audiences. With the tips and guidelines provided in this article, you are well-equipped to take your music visualizations to the next level in 2026 and beyond.