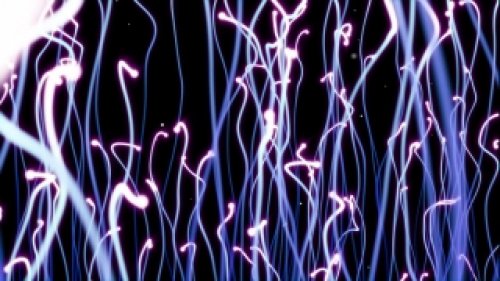
Introduction to Cinematic Light Effects
Cinematic light effects are essential tools for filmmakers and video editors looking to add depth and atmosphere to their projects. In 2026, these effects have evolved significantly, allowing for greater creativity and flexibility in post-production. From subtle lens flares to dramatic light leaks, understanding how to effectively use these elements can transform an ordinary scene into a captivating visual experience. This guide will explore the various types of cinematic light effects available, how to customize and install templates and presets, and best practices for integrating them into your workflow.
When discussing cinematic light effects, it is important to recognize their role in storytelling. Light can evoke emotions, establish moods, and draw attention to key elements within a frame. Whether you are creating a romantic montage or an intense action sequence, utilizing the right light effects can enhance the narrative and keep the audience engaged. As technology advances, tools that once required extensive expertise are now accessible to creators of all skill levels. This democratization of technology opens up new possibilities for artistic expression and innovation.
In this guide, we will cover the following aspects: types of cinematic light effects, how to customize and install presets, and practical tips for integrating these effects into various software environments like Adobe Premiere Pro, After Effects, and DaVinci Resolve. By the end of this article, you will be equipped with valuable knowledge and resources to elevate your video production projects in 2026 and beyond.
Types of Cinematic Light Effects
Understanding the different types of cinematic light effects available is crucial for selecting the best options for your projects. Here are some popular light effects that you can explore:
- Lens Flares: Often used to create a sense of realism and immersion, lens flares can add a dynamic quality to your visuals. They simulate the effect of light scattering through camera lenses, creating an ethereal atmosphere.
- Light Leaks: These are organic light artifacts that occur when light leaks into the camera. Often used in vintage or retro-themed videos, light leaks can introduce a warm, nostalgic feel.
- Glows and Halos: These effects can highlight specific subjects or areas within your frame, adding emphasis and visual interest. Glows are particularly effective in fantasy or science fiction genres.
- God Rays: Also known as crepuscular rays, these effects simulate rays of light streaming through clouds or trees. They can enhance the dramatic tension in a scene and create a sense of depth.
- Color Gels: By applying color gels to your lighting setups, you can create vibrant atmospheres that evoke different moods. Color gels can also be replicated digitally to enhance your footage.
Each of these light effects serves a unique purpose in storytelling, and mastering their use can significantly enhance your overall production quality. As you experiment with different types of light effects, consider how they align with the narrative and emotional tone of your project.
Choosing the Right Light Effects for Your Project
Selecting the right light effects for your project requires a deep understanding of both the narrative elements and the technical aspects of video production. Here are some tips to help you make informed decisions:
- Identify the Mood: Every scene conveys a mood or emotion. Decide what feeling you want to evoke and choose light effects that align with that emotion. For instance, soft glows can create a romantic ambiance, while harsh lens flares might evoke tension or excitement.
- Consider Your Audience: Understanding your target audience can inform your choices. For instance, a younger audience may respond well to vibrant color gels and dynamic light leaks, while a more mature audience might appreciate subtlety and realism.
- Test Different Combinations: Don’t hesitate to experiment with different light effects and combinations. Sometimes unconventional pairings can yield unique results that enhance the visual narrative.
- Stay Consistent: While creativity is key, maintaining a consistent style throughout your project is equally important. Ensure that the chosen light effects align with the overall visual style and narrative arc.
Customizing and Installing Cinematic Light Effect Templates
Once you’ve identified the light effects that suit your project, the next step is to customize and install templates and presets. Many software packages, including Adobe Premiere Pro, After Effects, and DaVinci Resolve, offer a range of options for incorporating cinematic light effects. Here’s a step-by-step guide on how to do this:
Installing Templates and Presets in Adobe Premiere Pro
- Download the Template: Begin by downloading the cinematic light effect template from a reputable source. Ensure that the template is compatible with your version of Premiere Pro.
- Extract the Files: If the template is in a compressed format (like ZIP), extract the files to a location on your computer.
- Open Premiere Pro: Launch the software and create a new project or open an existing one.
- Import the Template: Go to File > Import, and navigate to the location where you extracted the template files. Select the files and click Open.
- Apply the Template: Drag the template to your timeline and adjust the duration as needed. To customize the effect, select the clip and navigate to the Effects Controls panel, where you can adjust parameters such as opacity, blend modes, and color settings.
By following these steps, you can seamlessly integrate cinematic light effects into your Premiere Pro projects. The process is similar for After Effects and DaVinci Resolve, although some specific steps may vary slightly.
Customizing Effects in After Effects
- Import the Template: Just like in Premiere, start by importing your downloaded template into After Effects using File > Import.
- Drag to Timeline: After the template is imported, drag it to your timeline. You can then adjust the layer properties to fit your project.
- Access Effect Controls: Select the layer and navigate to the Effect Controls panel. Here, you can tweak various settings, including light intensity and color.
- Render the Final Output: Once you are satisfied with your customizations, render the composition to see your cinematic light effects in action.
Best Practices for Integrating Cinematic Light Effects
Integrating cinematic light effects into your video projects is not just about applying overlays; it’s about enhancing the storytelling. Here are some best practices to consider:
- Layering Effects: Combine multiple light effects for richer visuals. For example, layering light leaks with lens flares can create a more immersive atmosphere. Use blend modes to achieve harmonious results.
- Adjust Opacity: Subtlety is key. Lowering the opacity of light effects can help them blend naturally into the scene, enhancing rather than overwhelming the visuals.
- Use Keyframes: Animation can bring your light effects to life. Utilize keyframes to change parameters over time, such as light intensity or color shifts, to match the pacing of your footage.
- Color Grading: After applying light effects, consider color grading your footage. This process will unify the visual elements and enhance the overall aesthetic.
- Test on Different Displays: Before finalizing your project, test your video on different screens to ensure that the light effects appear as intended. Variations in brightness and color calibration can affect how light effects are perceived.
By adhering to these best practices, you can successfully integrate cinematic light effects into your projects, elevating the overall quality and emotional impact of your videos.
Conclusion
Cinematic light effects are invaluable tools for any video creator in 2026. Understanding the types of effects available, how to customize and install templates, and best practices for their integration can significantly enhance your storytelling capabilities. As you continue to explore the world of cinematic light effects, remember to experiment, push creative boundaries, and always keep your audience in mind. The right light can not only illuminate your scenes but also breathe life into your stories, making them unforgettable.